


Monday, September 27, 2010
So the thread about the article on boys reading got me thinking again today particularly about the conversation I had with DH last night. Not only are kids way way too dependent on electronic media these days but the electronic media these days are well lacking in comparison to the good 'ole days.
What I mean by this is..... Remember back to your childhoods or at least to the games of the early nineties. Games like Monkey Island, Day of the Tentacle, Myst and even games like Metroid and Contra. Back then we actually had to think to play these games. We'd hit a puzzle that must be solved in order to advance and we would have to sit there and actually think it through and figure out that puzzle. I remember just how awesome it was to play through Day of the Tentacle for the first time and how accomplished I felt as I figured out each piece of that puzzle. It was thrilling, challenging and FUN!
(Most) Games these days however are greatly lacking in these aspects. Think about the most popular games like WOW and even most playstation games. They all have walk throughs and help and pretty much hand you the full formula for the game before you even begin the quest. Gone is the mystery and the challenge that used to actually make our brains think. Now we have arrows and bright highlights that point us to our intended goals. Now if you can't figure something out the game will help you and hold your hand while you do it.
It's sad really. Kids expect everything to be handed to them, easy to use and ready to go. When faced with something that makes them have to think they say it's not fun or sucks. Now this is not all kids of course but the average kid. I have a split in my particular household for instance. I have my two step daughters who were raised with no reading aloud in the early years, tons of movies and a plethora of video games. The girls each have a netbook computer that DH and I control the content and access of. We have loaded games like Monkey Island, Day of the Tentacle, Sam and Max hit the Road ect. You would not be able to imagine the complaints we get that the games are too hard, not fun and boring. They would much rather sit fazed into the TV playing something like mario kart or Halo. Heck they would even prefer laying in their beds doing nothing but listening to the local pop channel if we would let them.
it makes me sad really because kids have so much potential and society and all of it's glorious technology is squashing that for so many children. Too many parents hear a whining child and flip on the TV and that is their cure. Too many parents say oh your only a child once so let them be kids. That is the most irritating thought to me. :tongue_smilie: So in that rationale being a child means wasting countless hours plugged into some device because it's fun? Being a child means you should let them do and play whatever they want regardless of the outcomes? How about changing the statement to "You are only a child once and you will only have this miraculous ability to absorb and learn due to brain plasticity so why not learn and make it fun?"
the other split/side in my house is the boys. We have made it a priority to read to them every day since they were born. Our home is filled with shelves of books and fun educational games. Behavior is rewarded by snuggling on the couch with a good book, playing a fun family board game or a brisk walk outside in the woods. Whining is dealt with much the same way after a gentle explanation that whining is not how we communicate. When we do watch TV you bet your buns it's going to be worthwhile and educational. The only exception is when daddy takes them out to see a new movie or we plan a family movie night and watch a great movie like UP or Wall-E. The only video games my oldest DS plays are leapster games and that is still very limited.
We are already seeing the differences in my oldest DS. He LOVES to read. He could sit there (and has) for hours curled up on his bean bag absorbed in a pile of library books. He begs to learn and loves anything challenging. he may get frustrated at first with something but instead of giving up and saying this is too hard, he tries again and again until he can do it.
I guess my point is that I personally think that the state of the average child today is sad. I think the opinions of the average parent are sad. I hate that these average parents look down their noses at the minority of us that don't have kids with a bagillion electronic devices as being mean or too strict. I wish that someone would open up their eyes and make them see that these kids are our next generation. They are the ones that are going to run the world when we are gone. What do you think is going to be the most helpful tools for this, video games, Ipods, TVs?
Sunday, September 26, 2010
Delta Pre-K Science Disocovery Kit - Body and Senses
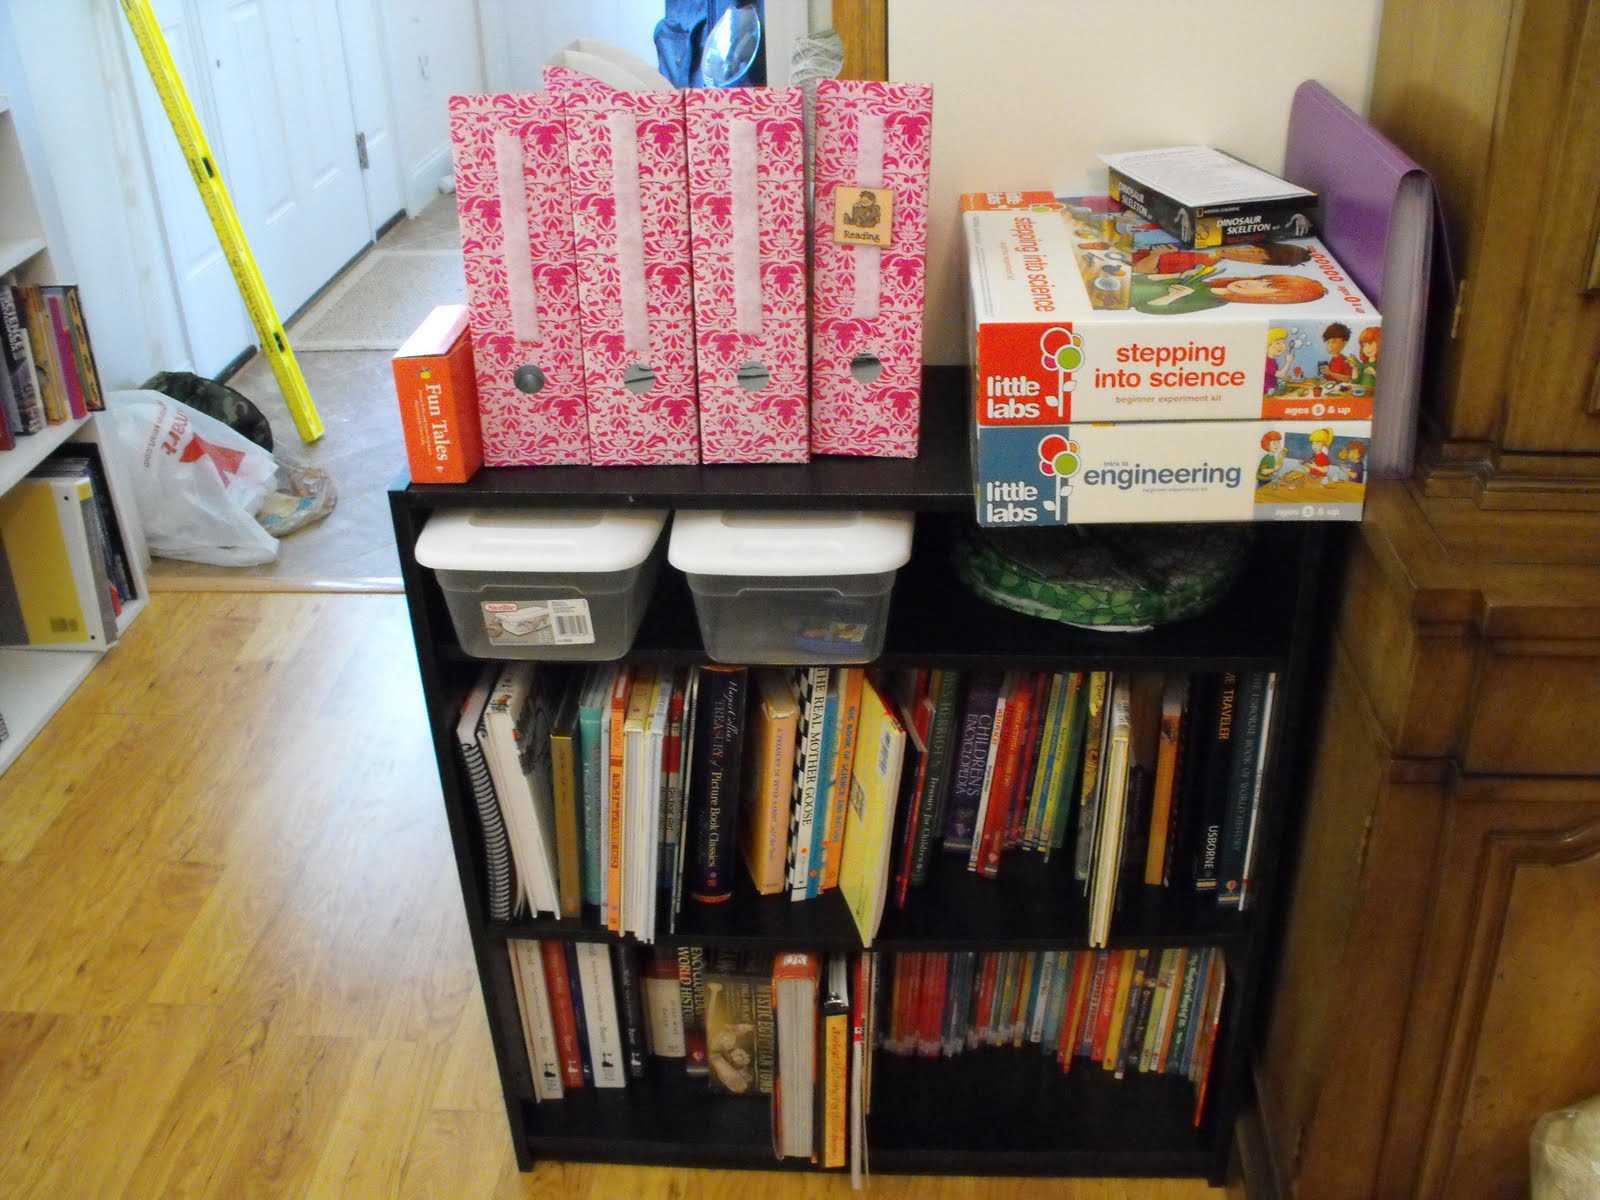
0 comments Posted by Homeschool Mom at 11:29 AMI finally had enough of the Thames and Kosmos stepping into science and my lack of desire to do science even with a begging pre-k'er and bought a Delta Pre-K discovery kit. Boy am I glad I finally caved and got it because it is amazing and I can't wait to get started now! The site description really doesn't do the kit justice either as they do not give page examples of the book and the description is rather vague of just how much is put into the activities.
Disclaimer: You will need to pickup some extra things or make some extra things if you really want to complete all of the activities in the book to their full potential.
What comes in the rubbermaid kit box is:
- Your discovery guide
- Poster of the senses
- Growth Chart
- Measuring tape
- Senses spinner
- 2 REAL! child sized stethoscopes
- X-rays
- Child safe mirrors
- Body shape sponges - quite a few I might add
- Body patterns
- Kickoff activities
- Science center
- Art Center
- Math Center
- Language Center
- Blocks and Building
- Dramatic Play
- Circle Time
- Cooking Activities
- Large Motor Activities
Friday, September 17, 2010
I *think* I finally have it all figured out and I have most of it already here waiting. We had some back and forth on things like science and history but i think I have finally found a place that I am happy with and will cease the grass is greener syndrome.
Math: (it may seem like a lot but the idea is to SLOW down math for this year so DS1 can get a really good grasp and foundation)
Singapore math (depending on we finish EM K B ) we may be in either 1A or 1B in the beginning of the year.
Supplementing with MUS Alpha one lesson stretched out over a week
supplementing with math mammoth 1A & B
Supplementing with japanese math workbooks
Sum swamp
dino math tracks
rightstart math games
LA:
Continue on with Dancing Bears
Continue on with AAS
writesource K
Aesops LA from RFWP
Science:
We finally decided to g the route of Nancy Larson Science and I am over the moon excited about it!
Supplementing with stepping into science and stepping into engineering for fun when demanded
History:
K12's kindergarten history program - this took me a lot of thinking to come to this conclusion. We had Sonlight but I decided that I would be way more likely to implement the k12
we'll also add in some fun hands on history stuff.
Ultimate guide to geography
Extras:
Pianimals for piano
Philosophy for young thinkers K set
Angel bear yoga
morning tai chi
continue with tae kwon do class
Monday, September 13, 2010
Dancing Bears a review and my thoughts on it so far.
1 comments Posted by Homeschool Mom at 11:58 AM
Dancing Bears is a synthetic phonics program from the U.K. which can be found here Sound Foundations. There are different levels one can choose from to begin with depending on the need of your DC. I decided to begin with Bear Necessities A1 since T is still rather young and still at the beginning of his journey relatively speaking. Books A1 and A2 are a more stretched out version of book A taken at a slower pace to better cement the information for younger children or those with LDs. The book comes with 2 sets of "flash cards" which can be stored in little envelopes in the front or back of the book. The front envelope is for the cards your student needs to master whereas the envelope in the back are for the cards the child has already mastered. The front of each card is the phonogram and the back has the sound(s) for the teacher. For example you would hold up the card with "a" on it and the child would be expected to give all teh sounds the letter a can make. Once the student can quickly recall the sound of each card it can be considered mastered and move to the back of the book.
Once all of the cards for A1 have been mastered you then move into oral blending using pictures. For example you will have a cat, dog and a man. You would ask the child to point to the picture of the c/ at or the d/ og or the m /an. the second step would be to move onto the phonemes with the same 3 pictures. You would ask the child to point to the picture of the c / a / t, d / o / g or the m / a / n. Once you have passed the oral blending stage you move onto print. When using the print sections the child is asked to trace words and to read using "the cursor". The cursor is simply a card with a notch in it so that you can move it over the words to encourage reading from left to right and so you can sound out each sound at a time for reading. The cursor works beautifully and can be used in early readers that you may use alongside the program.
overall I am very very pleased with this program and DS is enjoying it way more then OPGTR and things are making more sense to him which is awesome! It is great when he begins to really understand something he was struggling with before now that he has been given better tools to figure it out with. He has a great desire to learn to read and now we have a program and a method that is working on getting him to that goal and building him a very strong foundation that will make language arts much easier for him in the long run.
Thursday, September 2, 2010
All of our chore plaques

Family chore plaque

A close up of one of the chore plaques

Finally our new schoolroom in all of it's glory ( minus the wall map) :op
4 comments Posted by Homeschool Mom at 8:54 AMSo as you saw in earlier posts, we did have our school stuff integrated into our greatroom which was getting slowly taken over. I think it was a combo of nesting and desire to have our own spot that caused me to all in one day at 8 months preggo to move everything upstairs and "make" a room out of part of the huge playroom. The initial move took me most of one day and then the finishing up and organizing took a few weeks. It is now DONE except for hanging up the laminated wall map that is due from amazon any time now. So I thought I would share some pics with you all!
So here is a view from in the school room out into the playroom
Here is our reading nook with the nifty big ikea leaf and the big beanbag from big lots (14.99!) On each wall I have a stick up velcro mounted LED tap light so they can read when it gets dark. The set of 2 lights cost me 4.99 at walmart.
Now from here we are in the far reaches of the playroom looking over towards the school room. You can see the train table and off to the left the media center. You can see the big blank space on the wall above the desks to the left of my blue cabinet from here. This is the spot where the big wall map will go once it gets here.

Here is a more close up look at the media center which consists of a flat panel monitor and on the other side of the wall/bookshelf the computer running it.

Now we are "in" the schoolroom. This is the right side by the window which is our art center. Here we have our Ikea easel that used to sit unused in our playroom, the art drawers (menioned and shown in an earlier post) We have lots more organization in here now to keep the art supplies more at hand and accessible! On top of the blue art drawers I have a rotating organizer bought at five below for $2. The rotating organizer holds elmers glue and my set of scrapbook fancy edge scissors (Michaels for $5 with a 40% off coupon)

Here is the craft cart which houses more craft supplies like foam sheets, mini trees, wax seals, pastels ect. The Ikea roll paper holder sits on top of here so we can unroll it onto the group table for art time.

This is the art supplies wall center. I got the two hanging drawer sets from a store called "five below" Each cost me 5 bucks and they work so well for holding little things like pom poms, feathers, pip squeak markers and foam stickers! The colorful cups are from Ikea and are called bygel rail and cups. Best part the bygel rail stuff is CHEAP! It cost me

This is the left wall of the schoolroom. We hung up some awesome track shelves with real pine wood rather then the more expensive and yuckier particle board.
You can also see the workboxes for all our games, our DVDs, our writing center, our file folder games ect. The magazine holders on the bottom right shelf hold our piano books :) We just got and started pianimals! We keep our big keyboard in the top of one of the closets in the boys room.

Our writing center. I got this on walmart.com and it is awesome for organizing all of our papers, journal books, handwriting books and other writing related stuff! On top you can see some of our LA related big games like the TAG reader spelling game. In the top right cubby are some awesome spiral bound journals I got for ten cents a piece online!

The file folder games in their hanging organizer

The writing center bygel cups for holding pens, reading timers and other goodies

What a desk area looks like (we have 3 one for each boy) Each kiddo has a virco desk, chair worbox cart and color coded crate, expanding file, pencil box, mini crate and index card box. The color coordination makes it much easier to organize things!

My "teacher" cabinet. I got this 3 years ago on same at kmart in the baby section and it was sitting unused for a few years until now. It is PERFECT for school! I keep all my hands off mom stuff in here. It even had a removable rod for hanging clothes that fits the art paper rolls from Ikea perfectly! On the inside of the door it has a cork board and a chalk board. I have a mini pocket chart ($1 at target) where I keep our general workbox tags out of the way. I also have a map of the schoolroom with a typed out list of everything in it for DH or my mom in case they need to take over or want to help out. On top lives are interactive globe, a math balance and our science kits. The drawers on the bottom have office supplies like paper clips, rubber bands, bulk pens ect.

The right front corner of the school room by the art center. You can see the stacking letter trays I have to organize our construction and art paper here. You can also get an idea of how I made the dividing wall. I used 4 bookcases and one drawer cart lined up then tensioned together with a baby gate. This made a wall so solid that DH can't even get it to wiggle.

This is the underneath of the big group table in the center of the room. You can see each of the mini file crates for each boy under there which holds the folders for the current 6 weeks. I keep the big file crates down in the office more out of the way. You can also see my piles of newly unbound books waiting for me to spiral punch and bind them.

Thursday, July 22, 2010
Our larvae came in the mail today! It looks as though they are already getting ready to go into the chrysalis stage as they are all going to the top of the container and hanging out. I'll post pics as they progress!

Editing to add the rest of the stages!
Chrysalis!

We have butterflies!

We kept them for 2 days so DS could see them eat and fly around then we took them outside and set them free :o)
We moved our school stuff down into our greatroom some time ago to make room for the new baby. So I figured while I have camera card loaded and I'm on a roll I'll get pics up :op
>
The Sonlight shelf. It holds all of the Sonlight books for cores P 3/4 through core 1. I also have some other history stuff on the bottom shelf and my science kits up top for pre-k
Next up we have the early reader organizer. I got this from walmart.com site to store for 20 bucks and it holds our early readers perfectly!

Next up is the workbox and desk area. Eventually there will be one more desk and one more drawer cart and then it will be complete unless we are graced by any more "surprises" LOL

Next up is the math and LA book shelf. Top of the case has my big old sing spell read and write kit box. Top shelf is Singapore math and Math-U-See as well my Rightstart math games kit. Bottom shelf is all phonics and grammar.

Nest up is my Science, languages, misc and early reader shelf. LOL Up top in the crates are all our school DVDs and software. Very top small shelf is more early readers like bob books and our magic treehouse collection. Second shelf is where some science and our misc books live. Bottom shelf is tall science books and languages (Latin and Japanese).

Onto to the misc drawers. On top the Math-U-See blocks live. Top black drawer is filled with the game pieces for all our file folder games each in it's own ziplock baggie and marked for easy finding. The yellow drawer keeps all our learning finances games and stuff. Red drawer is musical instruments. Blue drawer is our language arts manipulatives.

>

Around the side of the wall we have the math manipulatives drawers and more workboxes. I have an insane variety of math manipulatives that the kids like to pull out to play with and we use with our math work time. Ontop of all the workboxes we have our learning resources board games. You can have a look at the workbox post to check out what is in the boxes.

Next up is the writing center which has it's own post explaining it's parts

Then we have the mommy area off in a corner past the toddler play enclosure where kiddies dare not tread :op Top shelf has more shoeboxes with various school supplies and are labeled with sharpie marker. Next lives my science kits and a stack of fun time workbooks. Next is my microscope, slide set and talking globe. Then comes all of my teacher's manuals as well as double of consumable books for the not yet old enough kiddos to use. Bottom shelf is my binders that hold Sonlight, History Odyssey and REAL science odyssey.

then comes the little mommy shelf by the window. Top has my drawing paper roll holding I got from IKEA. Top shelf has construction paper, bin of art supplies and stuff for the wall calendar. Bottom shelf has extra magazine files, and various supplies as well as my box of DVDRs.

So that is our "school area" for now. At some point when the youngest kiddo outgrows the big playroom toys our school will move up there and have it's own space. For now though it works and fits nicely into our greatroom.
Another fabulous idea from the Well Trained Mind Forums!
This is two full set of blocks put away into one art bin. You could use a fishing tackle box too as they are pretty much the same thing but we had an art bin on hand :op
I finally got around to creating a writing center for our homeschool! I used the list and ideas given by our writeshop primary book to build off of.
The stackable file

The writing prompt box. I used some from the writes ource series and then found more in a google search. I am still not done writing them all on cards yet :op

A quote on our wall :op

So there you have it our writing center in it's full glory.
Like everything I have tweaked the workboxes to the point where I am finally confident and happy :) I have also added in a filing system to help me keep more on top of things ala the well trained mind forums. So here's the details on my new system!
First off I went out and bought 2 ten drawer carts from sams club which are PERFECT for workboxes and only cost 29.75! The best part is they look nice too since they are in our greatroom.
The two desks are vico desks and are AWESOME! They are adjustable size so they will grow with the kids. On top of each drawer cart I have an accordion file that matches each kid's color. I will explain the use of the accordion file further down when I get into filing. On the right side of each cart there is a hook that I hang the workbox tag schedules on. If you haven't read much about workboxes yet then the way it works is, as a drawer is completed the number tag is removed and then put onto the schedule tag. I should mention that I used velcro sticky back dots on the front of each drawer, on the schedule cards and on the number tags themselves. This way the tags can be moved around as needed. Each child gets their own color and I print them all out on construction paper and then laminate them. For the schedule cards I then hole punch the top corner and put a binder ring through them so they can hang off the cart.


Now what goes into the files you ask? Some have asked about separating and filing away the IG pages but I don't do that as it already matches up. I just use the numbered weekly tabs from Sonlight and that makes it easy peasy to match up to my file numbers anyway. What I file is workbook pages or consumable pages. I sit down and tear out all the workbook pages during my prep stage and file them by week using the TM or SL IG as my guide as to what is used when.

Here are the daily schedule cards. I got them from DIYplanner.com they are 4up 3x5 index card size. I print them on cardstock then cut them to size. I print them front and back 2 I get 2 days per card.

Now as each day is over I put the work back into the file for that week to keep for portfolio review. NOTE I don't keep ALL the papers but only some which best illustrate our progress and what we have done. When the year comes to a close I will put the papers all together and bind them with my zutter bind it all into a neat little keepsake book. This will keep it all neatly together for the portfolio review as well as make a nice keepsake for my DC.

